Showing posts with label Acrylic Paintings. Show all posts

Tuesday, September 28, 2010

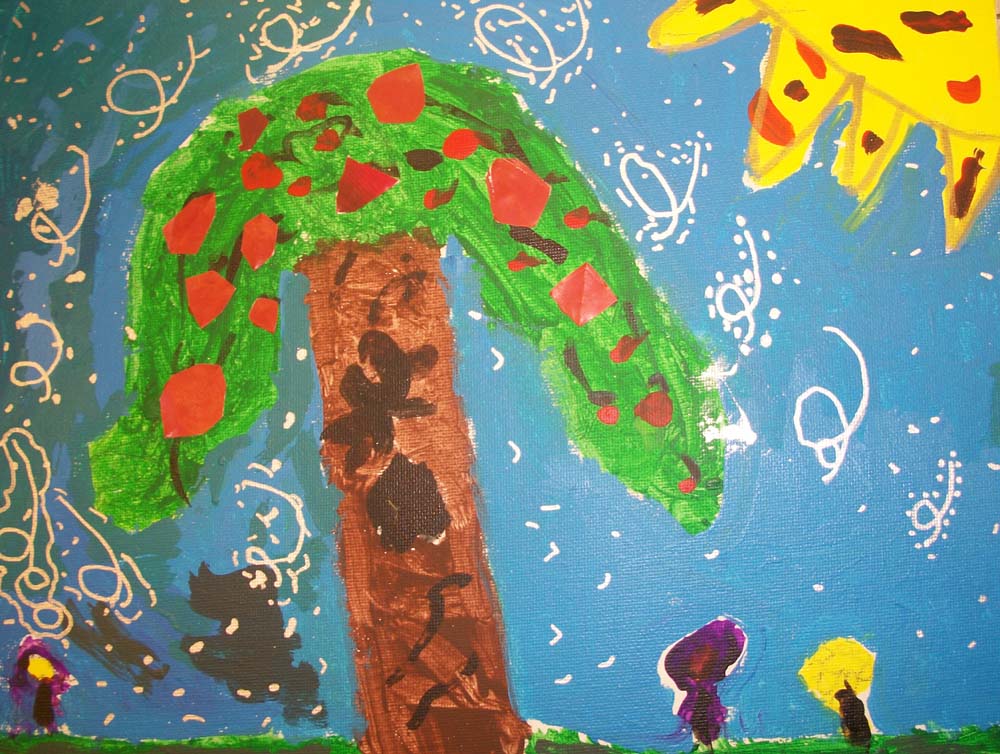
If I Were a Tree

Before starting this mixed media project, we read one of my favorite books,

   "If I Were a Tree" by Dar Hosta


As you can see the illustrations are lovely and are made by collaging colorful papers and adding metallic embellishments.  This would be a great project to do with painted papers, but we chose to stick to acrylics on canvas boards to save time. Before starting, children were asked "If you were a tree, what kind of tree would you be," which is the main thematic line of this story.  They sketched their tree designs and began painting with acrylics.  After these paintings dried, metallic paint markers and shiney paper collaging was used to add a whimsical touch. Enjoy our fantastic trees.


Friday, January 15, 2010

Clay Textured Plaques

In Model Masters we explored Air dry clay, texture, painting, and beading--All in one project!  After sketching our landscape designs we began

Step 1: Students started with a ball of wedged air dry clay and made a slab  by flipping it over and flattening several times.  After the clay was about 1 inch thick, the clay was cut into a specific shape (square, circle, star). 

Step 2:  Clay tools were used to add relief--high and low areas--in the plaque.  Tools were also used to add different textures in the designs. 

Step 3:  Two holes were punched in the top of the plaque to allow it to hang. 

Step 4:  After allowing to dry completely, plaques were painted using vibrant acrylic paints. 

Step 5: Wire and glass beads were threaded through the top holes so the plaque could be displayed.


Thursday, October 29, 2009

Rouault's Royalties

In Creative Color we completed our very first painting project, which was inspired by Georges Rouault.  Rouault was a French expressionist painter who began his artistic career as a stained glass maker.  His paintings are very much inspired by the vibrant colored glass, which is separated by bold black lead lines.  The subject matter of Rouault's paintings often focused on royal courts and other important people. The first picture, "Old King," is currently on display at the Carnegie Museum of Art!


Using Rouault's technique and subject matter to inspired us, we used the kings, queens, and jacks of several decks of cards to guide our paintings.    Playing cards have exceptional detail and each deck is different, so they are great to practice your keen observation skills!


Supplies:
Face Cards from decks of playing cards
Canvas Panels
Acrylic Paint
Palettes or disposable plates
Brushes

1. Since these paintings were highly detailed, sketches were carefully drawn directly--and lightly for easy erasing--on the canvas panels.  We only drew the top half of the card, rather than doing two faces, so they would look like portraits instead of cards in the end.

2. For this painting project our goal was to apply the paint to look like vibrant. swirling stained glass windows. We double and tripled dipped our brushes into several analogous colors--like red, orange, and yellow--and swirled them onto our canvases.  This created a unique marbled effect. 

3. After we painted our entire king, queen, or jack, we outlined all the details in black paint to emulate stained glass leading.

Here are some pictures of our works in progress.


Here are the "Royal" Results!

Emmalee

Erin

Hannah

Emily

Roman

Sydney

Wednesday, October 14, 2009

"Old Bear" prepares to Hibernate!

This week in Art Through Children's Literature we read "Old Bear" by Kevin Henkes.  This is a fabulous children's book that tells the story of a bear hibernating during the winter and dreaming of being a cub again.  He imagines the the springtime flowers, the summer butterflies, and the fall leaves blowing.  After reading, we discussed how animals prepare for the cold winters by eating lots of food or stocking up like squirrels do.  We even talked about how some, like geese, fly south for the winter to warmer climates.


This project took one class and used the following supplies:
Black and/or Blue Construction Paper-9"x12"
Manila Oaktag-9"x12"
Leaves
Tempera paint in warm colors, white, brown, and black
Scissors
Glue

1. We began this art project by taking on the tedious, but fun, task of learning how to draw a bear in two different poses, walking and standing.  We started by drawing the snout, then the head, and finally the body on manila oaktag. 

2.  Next, we used brown tempera to paint our bears. Students were shown how to add orange to add "highlights" to the parts of the bear that the sun hits, such as his head, back, and the front of his legs. We used the back of our brushes to scrape the wet paint to create a furry texture. We used bold black paint to outline our bears and add eyes and fur ruffles.

3. While our bear paintings dried, we used a variety of real leaves to print leaves on dark blue or black backgrounds.  We simply painted the underbellies (veined part) of the leaves with warm oranges, yellows, reds, and browns, and then turned them over and pressed them to the paper. A paper towel placed on top of the leaf while pressing helps get an even print and keeps hands clean!

4. Lastly, we carefully cut out our bears, leaving a bit of the manila border to make them "pop" off the dark paper, then used glue sticks to attach them to their habitats.

Here are some of our fabulous "Old Bears!"

                      Jake
                            Aidan
          Jack
                           Chloe
     
                    Eddie
               Maddy
                         Maxwell
           Megan
         Meredith
            Gaia
  
        Yula
     Miss Vanessa