Showing posts with label Ages 7-10. Show all posts

Friday, October 22, 2010

Mexican Marigolds

In Journey Around the World, 4-7 year olds visited Mexico, where we learned about the annual Day of the Dead celebration or "Día de los Muertos." Marigolds are an important flower during this time as they keep the celebrations welcoming and joyful for all involved. 


This project took two 1 hour classes and used the following materials:


White Tag Board 12"x18"
Blue Construction Paper 12"x18"
Tempera Paint-red, orange, yellow, pink, metallic gold (warm colors)
Paint Shaper Combs
Sequins
Green Construction Scraps
Warm Construction paper 9"x12"
Oil Pastels (warm colors and black)
Scissors, Glue, Paintbrushes


On the first day students began by dividing their tag board into thirds while the paper is in the horizontal position (this just has to be approximate).  Next warm colored tempera paint, various paint shaper combs, brushes, and sponges were provided.  Students painted the first section mostly red (they could add orange or gold), the second orange, and the third seciton yellow.  We emphasize trying to create unique textures in each section of these painted papers. These were set aside to dry for the next class.


Next students chose a piece of warm colored construction paper and drew a vase form of their choice.  Students were to make sure their vase was large and took up most of the paper. These were cut out and then oil pastels in warm hues were used to add a simple geometric or line pattern.  These were glued to the bottom portion of the blue construction paper (the blue is in vertical /portait position)


The next class students began making Mexican Marigolds--they had a blast and learned some great new cutting skills. 

First the painted paper was cut into 3 parts, one of each color.  Then each color was cut in half to get 6 squares total, two of each color.  I showed them how to "round out the corners" to create a circle. 

 From there students were free to cut, shape, and tear their circles to create petals.    They could cut notches, fringe, rounded petals, spikes...Whatever they wanted.  The goal was to create 3 separate flowers, each with at least 3 colors and layers.  Smaller circles were cut for the centers and extra layers of the fluffy marigolds. 

Tacky glue was used to add shiny sequins to the centers to jazz these amazing flowers up (Not that they needed it!)


The last step was to use various shades of green construction to create a stem and leaves for each flower.  The flowers, stems and leaves were all glued onto the blue construction so they filled the vase. 

This project makes a great display for fall, as it is colorful, cheerful and had bold fall colors.  It's really not as complex as it sounds--all the steps are simple!


Tuesday, September 28, 2010

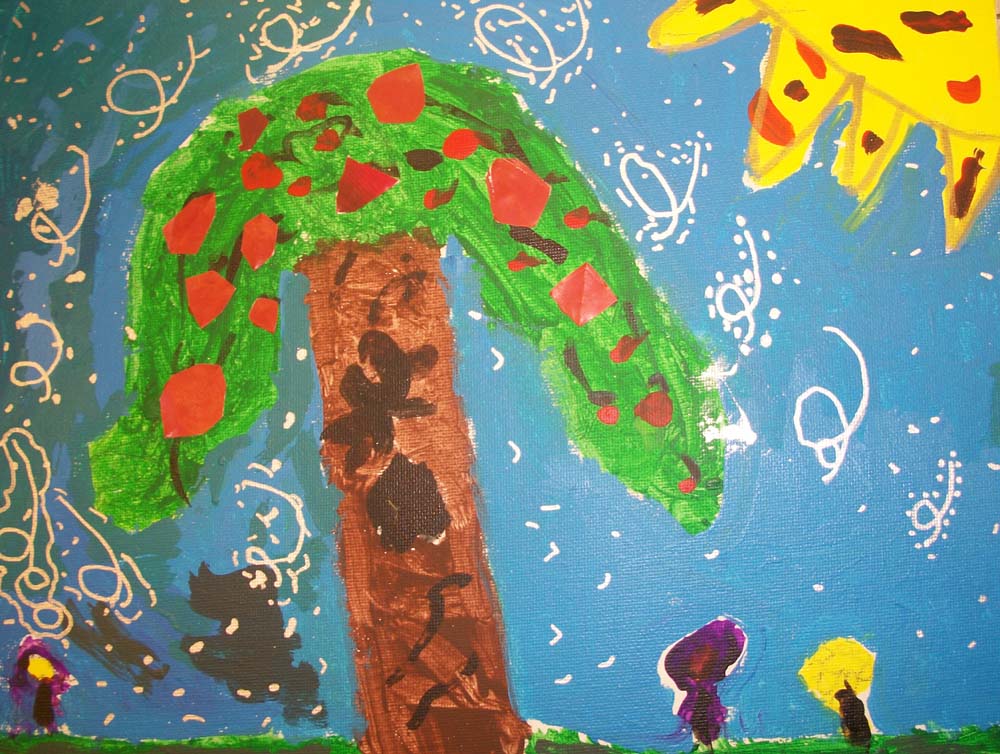
If I Were a Tree

Before starting this mixed media project, we read one of my favorite books,

   "If I Were a Tree" by Dar Hosta


As you can see the illustrations are lovely and are made by collaging colorful papers and adding metallic embellishments.  This would be a great project to do with painted papers, but we chose to stick to acrylics on canvas boards to save time. Before starting, children were asked "If you were a tree, what kind of tree would you be," which is the main thematic line of this story.  They sketched their tree designs and began painting with acrylics.  After these paintings dried, metallic paint markers and shiney paper collaging was used to add a whimsical touch. Enjoy our fantastic trees.


Monday, February 1, 2010

Chinese Landscape Paintings

In Model Masters we traveled to the Far East and learned about the serenity of Chinese and Japanese Landscape paintings.  We looked at several reproductions of Asian landscapes and noted how they were simplified in terms of detail and colors.  These landscapes instead captured a mood and the emphasis was on expressive brushstrokes. 


We used Sumi-e rice paper to carefully sketch our landscapes.  I discussed how this paper is very delicate and required quick brushstrokes.  If you try to work an area to much when painting, the paper will dissolve and you'll be left with a hole!  After painting our landscapes with watercolors, we added Chinese symbols that described the mood of our paintings with black India Ink.  To sign our work, we made a small square stamp out of foam printing plates and used red ink.

Andrew

Gaia

Heather S.

Jake

Josh

Meghan

Nicholas

Stephan

Victoria

Yula

Miss Vanessa

Thursday, December 17, 2009

Stained Glass Fruit

In Model Masters students explored the popular art of creating a still life.  A variety of fruit was displayed and we were inspired by the French expressionist painter Georges Rouault.  Rouault's paintings reflect his former occupation as a stained glass artist, as they have vibrant colors and thick black outlining. This lesson was inspired by the fabulous art blog, Deep Space Sparkle!  We began this art project by drawing the fruit still life with pencil on canvas boards. Here is a picture of our fruit still life set up.


 Acrylic paints were applied thickly by double loading the brush with two analogous colors (red and orange, for example).  Paint was swirled on the canvas to mimic the look of stained class.  Black paint and tiny brushes were used to outline all the fruit, the bowl, and to add a stained glass pattern to the background.  Enjoy!  *Some students were not here the first day we did this project with fruit, therefore they painted a gourd and pumpkin still life.


Jake

Gaia

Adam

Anne-Kalin

Camille

Josh

Kenna

Maggie

Megan

Nicholas

Stephan

Victoria

Miss Vanessa